Leveraging the power of JavaScript in OutSystems: enhancing low-code development
Why use custom JavaScript (JS) in OutSystems
To build a web or mobile application, OutSystems offers you the standard functionality you would need right out of the box. They’ve done a lot of the hard work for developers, writing their low-code platform on top of existing web development languages – such as JS. This means that as developers use the drag and drop functionality, behind the scenes the OutSystems platform translates this into the base languages.
With powerful built-in functionality, why does OutSystems need to allow custom JS code integration for front end development?
Custom JS integration provides developers with the means to expand and enrich their applications beyond the standard built-in functionality. As broad as OutSystems’ built-in functionality is, it can’t cater for all possible variations and requirements. This aspect of extensibility ensures that developers and businesses can address bespoke requirements without encountering limitations.
Common Use Cases of JS in OutSystems
A few examples of how JS can elevate OutSystems applications:
Custom UI Components: JS enables the creation of custom UI components that offer enhanced user experiences and functionalities beyond what OutSystems offers with its drag and drop functionality. By leveraging JS, you can design and create just as you would in traditional High Code. Custom UI components generally work best when a combination of built-in functionality and custom JS code is used. This way, you maximise on the customisability and maintainability. An example of such a component is our Percentage or Amount Input Forge Component which allows users the choice of entering either a percentage or an amount. Besides other features, JS is used in this component to generate an input mask (using an external JS library) for the amount field so that the value includes thousand separators.
Calling internal Web Block Client Actions from the Screen/parent Web Block: The traditional approach for this is to trigger the OnParametersChanged event, but this can become very tricky and hard to maintain due to the limited nature of this feature. Since this event responds to all input changes, it can be tricky to know what Client Actions to call based on what input changed. Having all the inputs updated each time can also cause headaches. Calling the Client Actions via JS on the other hand, allows complete control to only call the Client Action you need. Find out more here
Calling Client Actions Asynchronously: This can be used to improve performance as well as prevent rendering blocking. You may have noticed that sometimes the UI in your Web Block doesn’t re-render until an event in a Client Action completes; this can be overcome by making the update of the UI asynchronous. See the examples section below for how to implement this. Find out more here
There are many more examples of good use cases, both in the OutSystems Documentation (such as this ‘How to’ guide on resizing a popup window) and on the Forum where users have helped each other with coding questions.
How to Incorporate JS in OutSystems
Integrating JS into OutSystems applications is simple and there are several ways to achieve it.
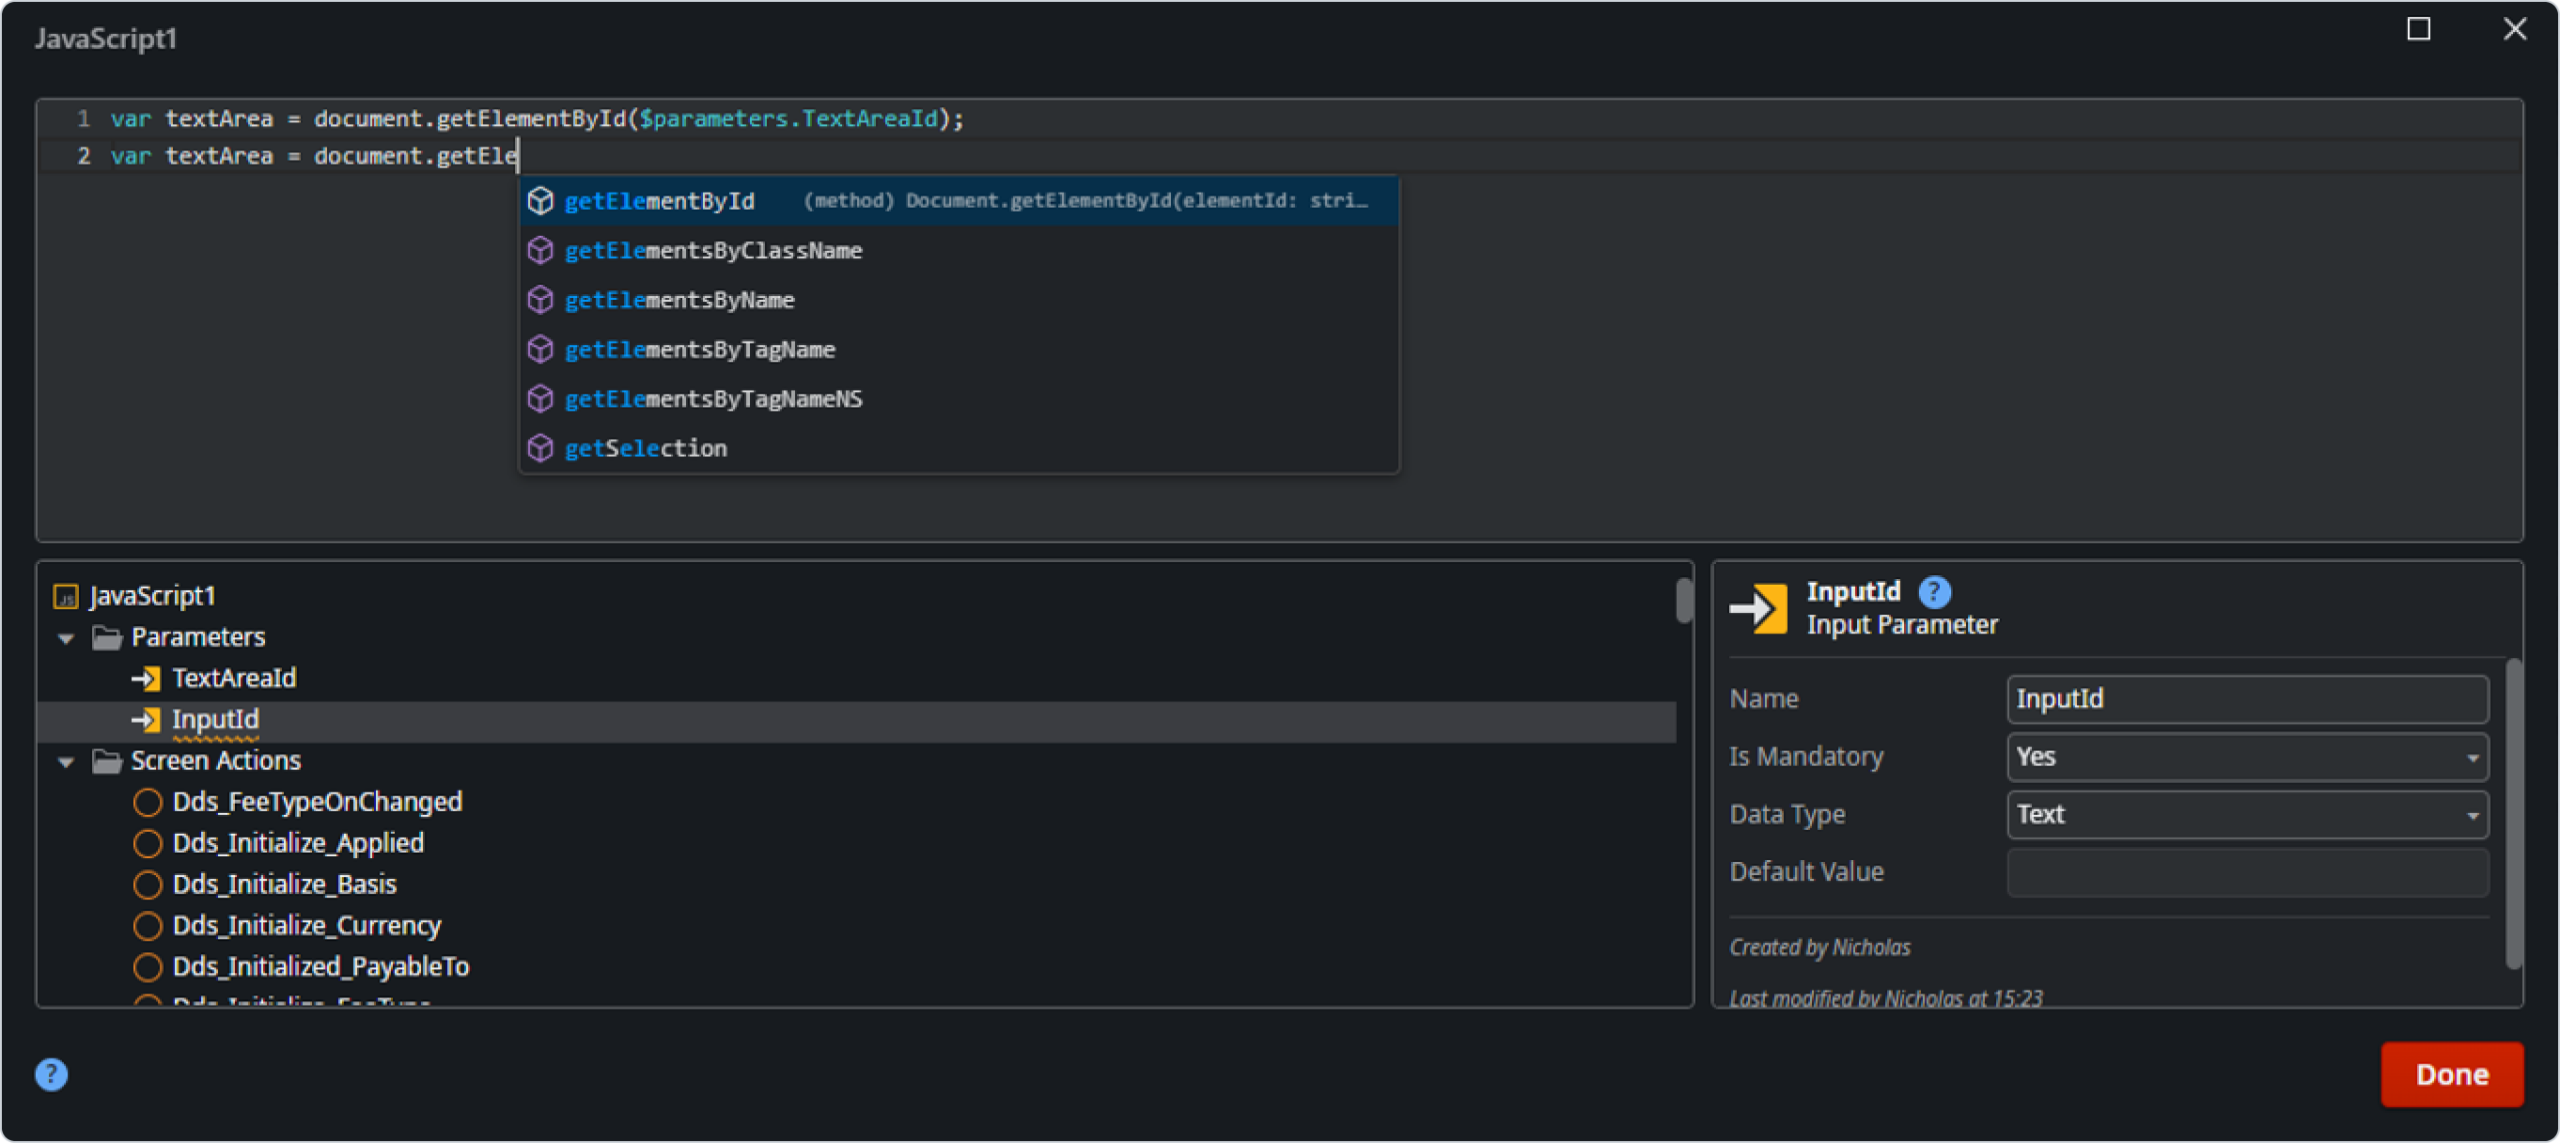
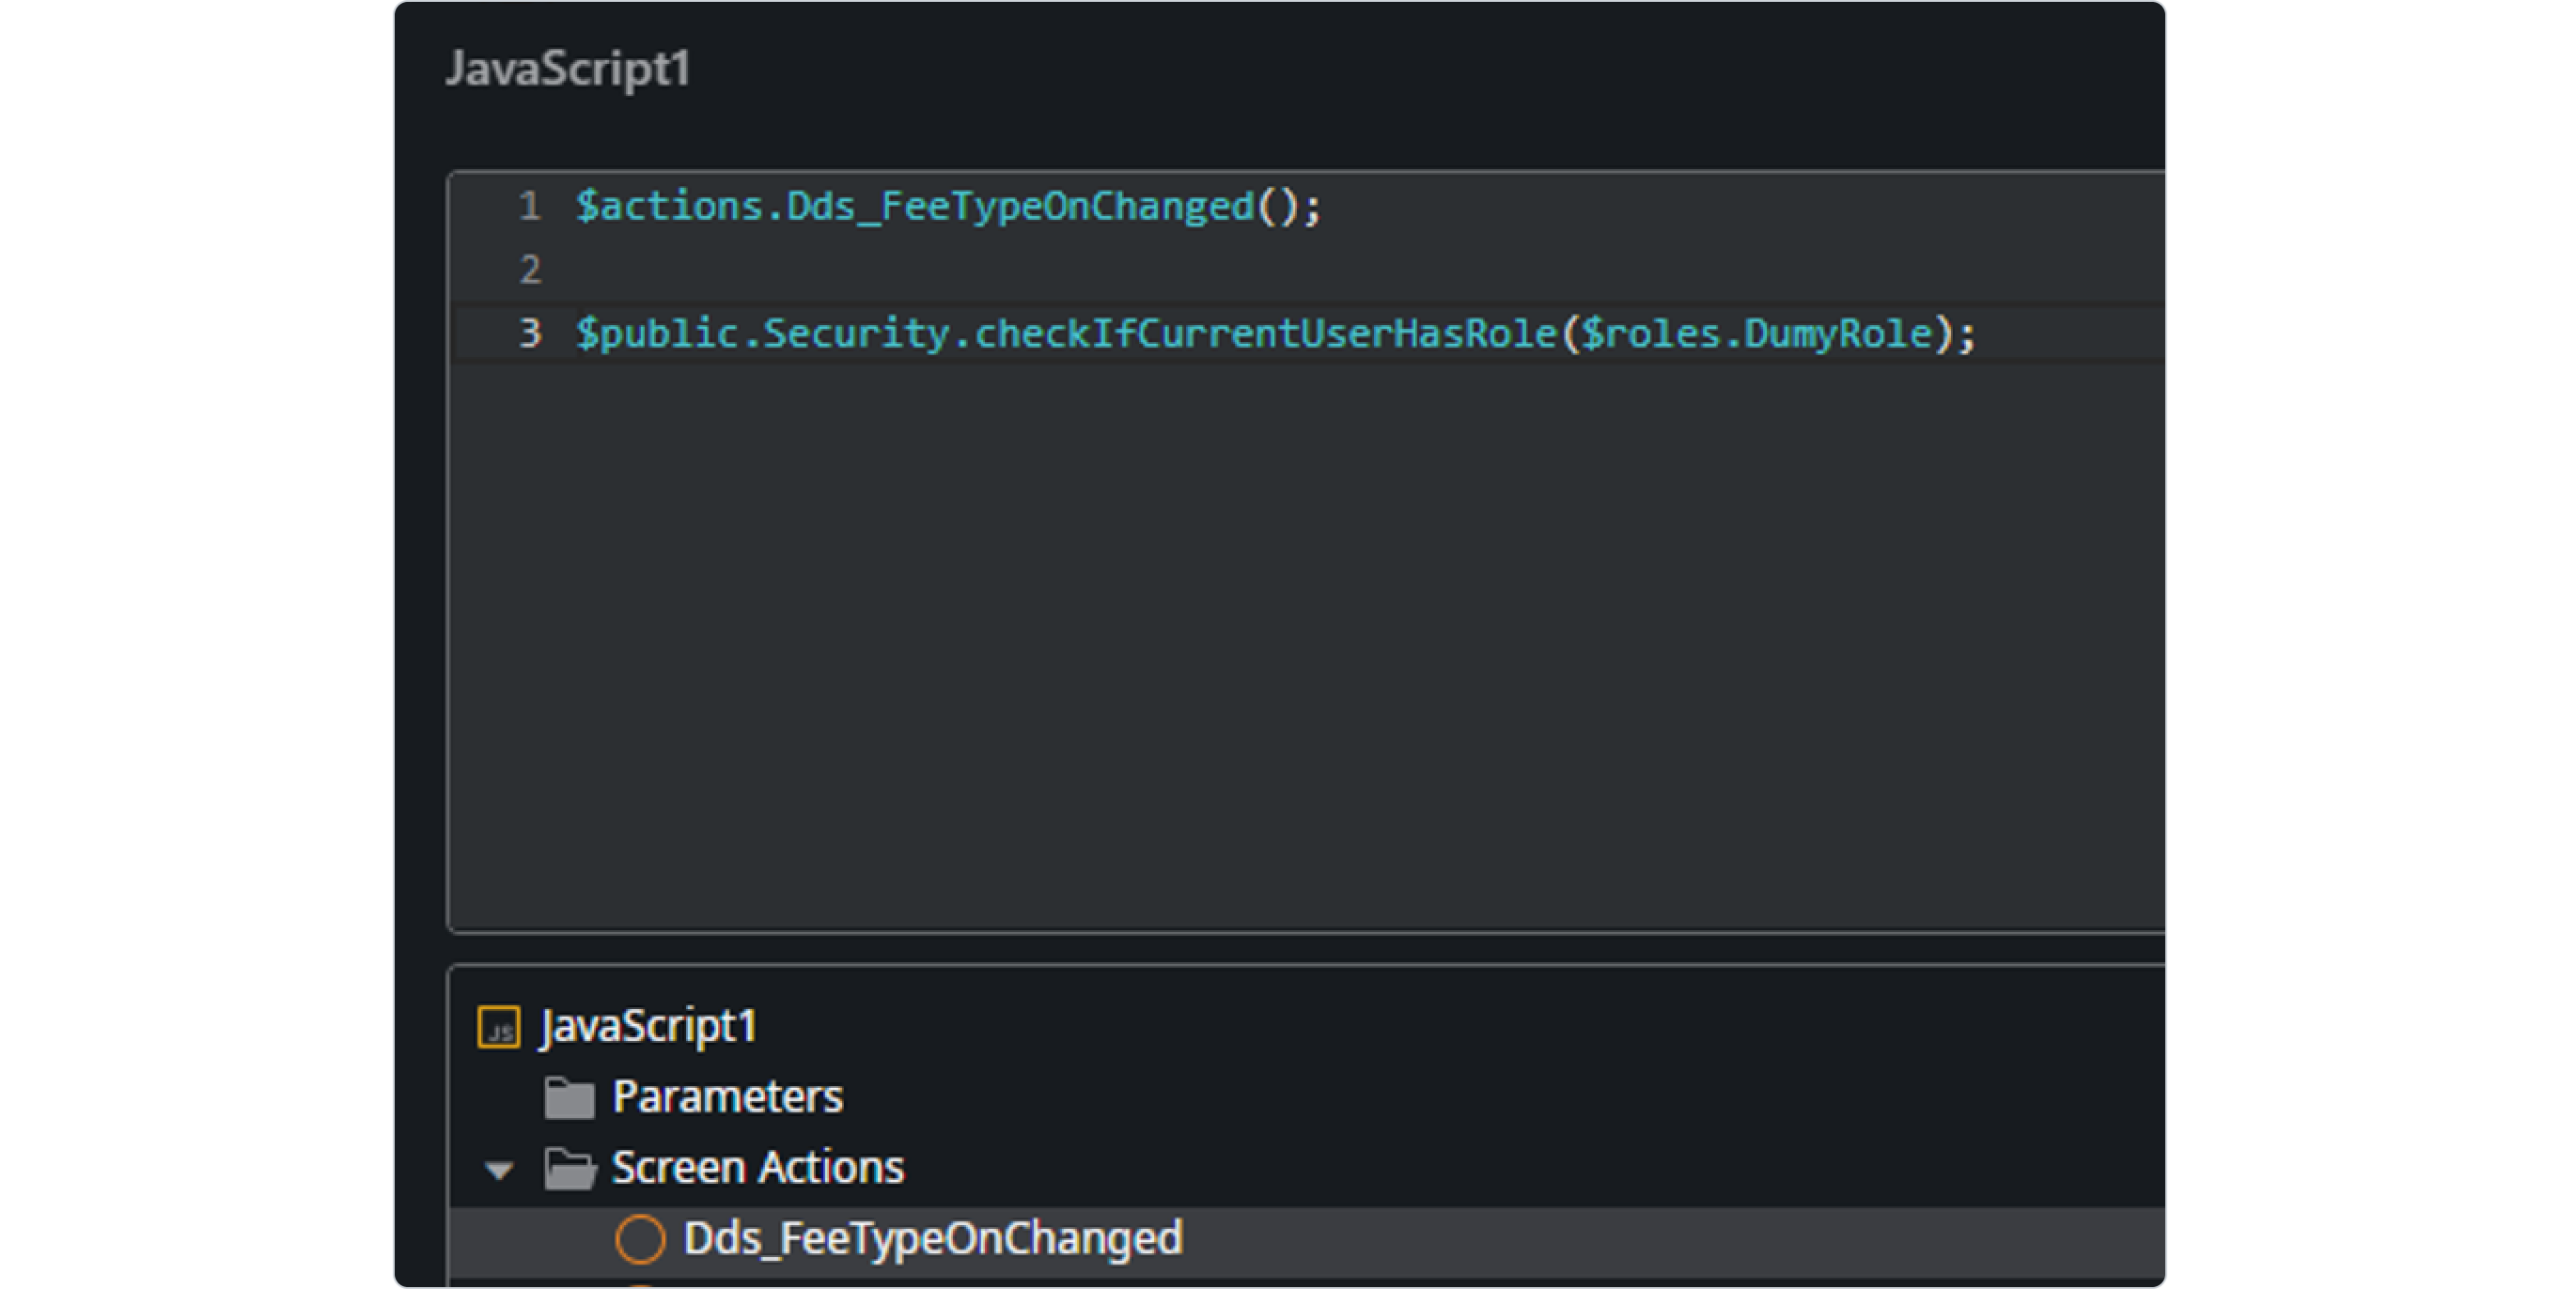
Add a JS node into the flow of a Client Action: the JS node editor acts as an IDE and includes auto-complete, syntax validation and error checking. Inputs and Outputs for the JS node allow the JS to easily interact with other elements in the app in a Low Code fashion. It also allows you to call Client Actions using the ‘$actions’ OutSystems predefined JS object and access useful OutSystems APIs using the ‘$public’ OutSystems predefined JS object. You can see these in use in the second screenshot below where we reference these two objects – the first to call the ‘Dds_FeeTypeOnChanged’ Client Action and the second to call the ‘checkIfCurrentUserHasRole’ API on the ‘security’ object which is a property of the ‘$public’ object.
JS Nodes can also be added to Global Client Actions, making them public to all screens and Web Blocks, and able to be called from any Client Action.
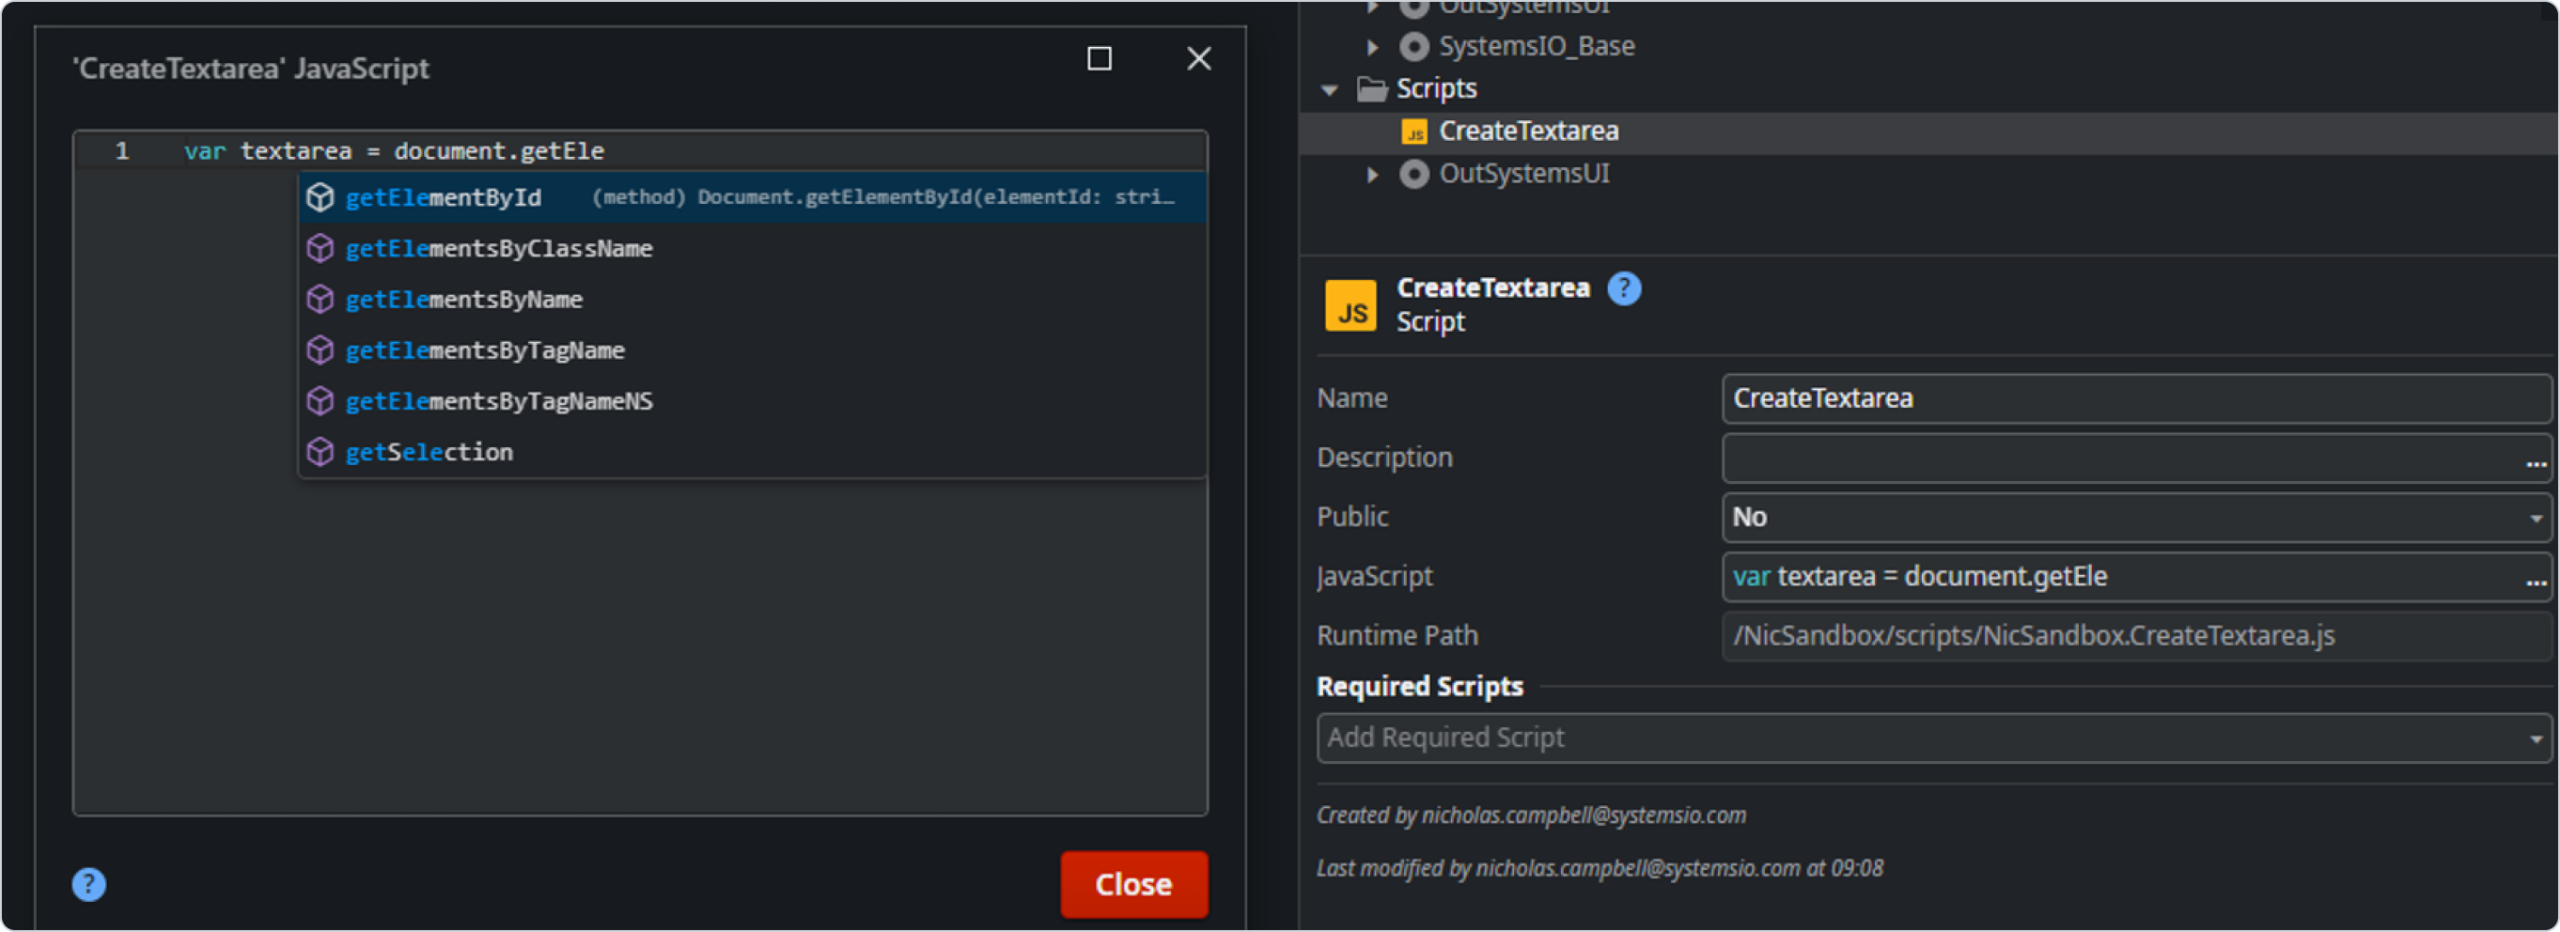
Add Script files in the Interface Tab which effectively act as reusable libraries. These can contain self-written JS or a downloaded external JS library. These scripts can be added to Modules, Screens and Web Blocks using the ‘Required Scripts’ property. The advantage of this method is that these libraries are reusable not only within the current module but across Modules using the ‘Public’ property. These Scripts are evaluated in the global scope meaning you can use functions and objects initialised in this script in any JS element of the Screen/Block. Note that JS placed on the Module, Web Block and Screen using Script files run/load automatically and in this order. This was used in our Percentage or Amount Input Forge Component to make use an existing input mask library.
How to Incorporate JS in OutSystems
Example 1
1. Create a global Client Action:
Go to the Logic tab in Service Studio.
Right-click on “Client Actions” under the module you’re working on.
Select “New Client Action” and give it a name such as “DisableButtons”.
2. Add JavaScript code:
Open the newly created client action.
Drag and drop a JavaScript node into the flow.
Write or paste the following JavaScript code into the that JS node editor.
					    // Get all buttons on the page
    var buttons = document.getElementsByTagName('button');

    // Iterate over each button
    for (var i = 0; i < buttons.length; i++) {
        // Set the disabled attribute of the button to true, disabling it
        buttons[i].disabled = true;
    }
3. Call the Client Action:
Determine when you want to disable the buttons (e.g., on page load, after a button click).
Add an appropriate trigger (e.g., button click event, screen load).
Drag and drop the “DisableButtons” Client Action into the appropriate action flow.
Example 2
There are many more examples of good use cases, both in the OutSystems Documentation (such as this ‘How to’ guide on resizing a popup window) and on the Forum where users have helped each other with coding questions.
1.Create the scaffolding for this example, implementing the synchronous approach:
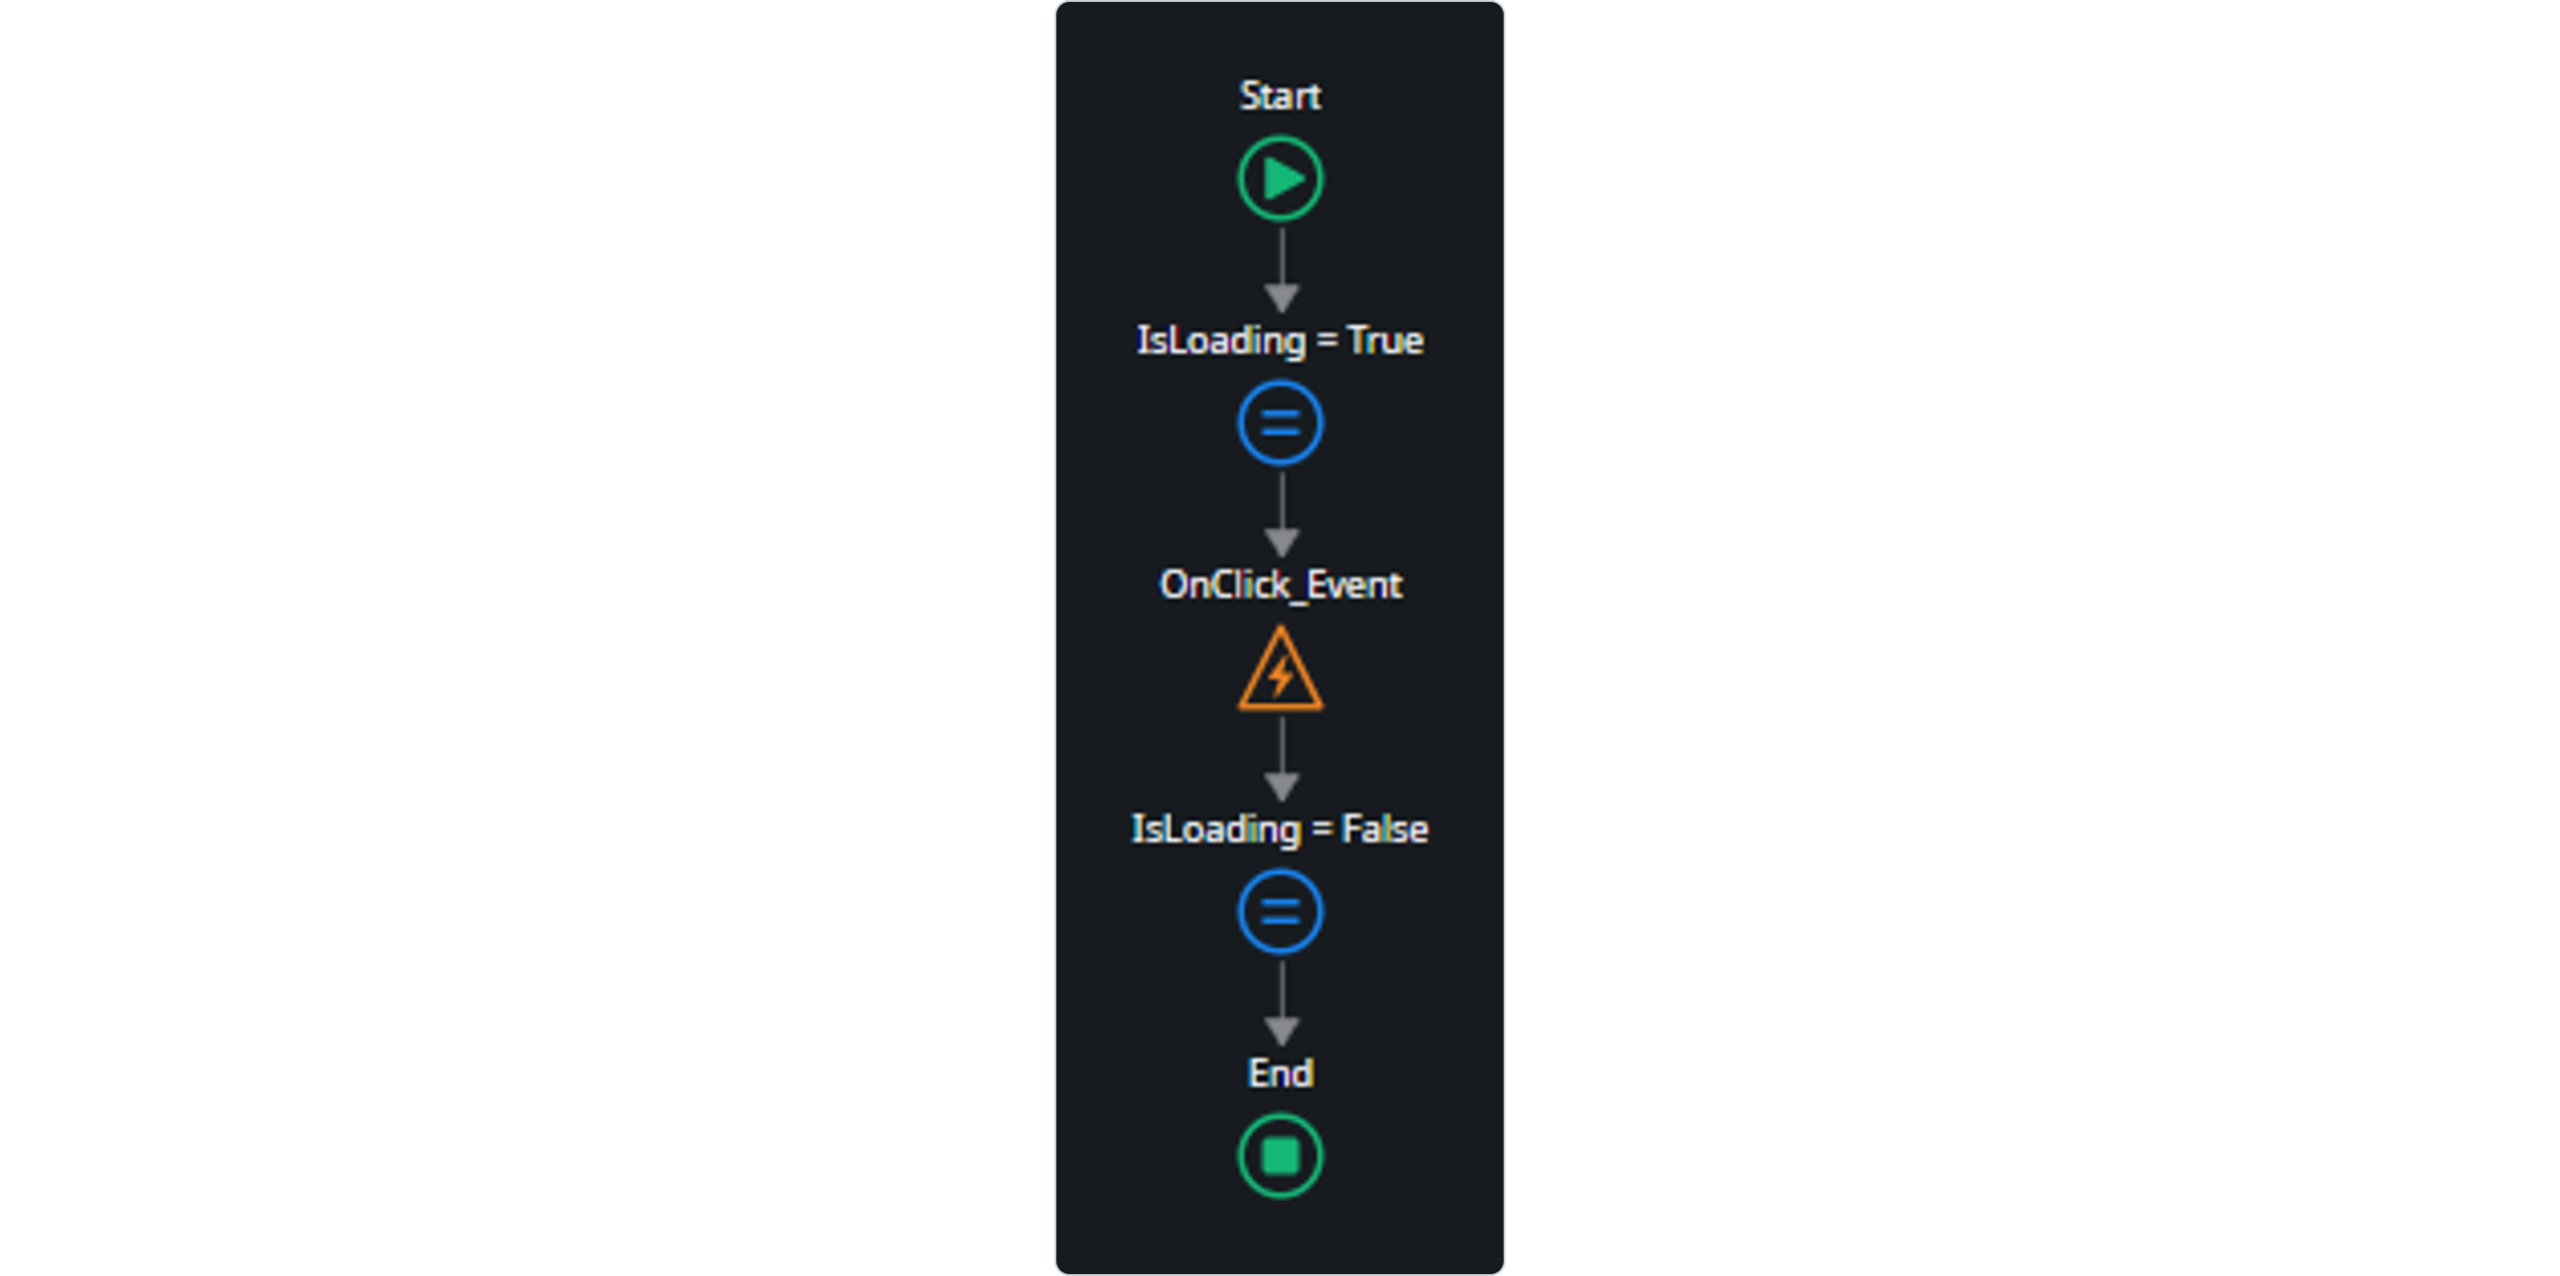
Create a Web Block and put a standard ButtonLoading widget on it. Create a local Boolean variable called IsLoading and assign it to the IsLoading input of the ButtonLoading widget. Add a ButtonOnClick action to the button that looks like the following screenshot. The idea is that the local IsLoading variable is set to True while the parent screen is handling the event and False thereafter, causing the ButtonLoading widget to show its spinner only while the event is being handled. We’ll leave it up to you to add a parent screen handler for this block that calls a server action or the like that takes long enough to allow some loading time to show the spinner. Here is how the ButtonOnClick action should look:
2.Observe the rendering blocking effect:
Run your app and click the button, you will find that it never shows the spinner no matter how long your event takes to be handled. The rendering of the spinner is blocked by the event being handled.
3. Implement the asynchronous method:
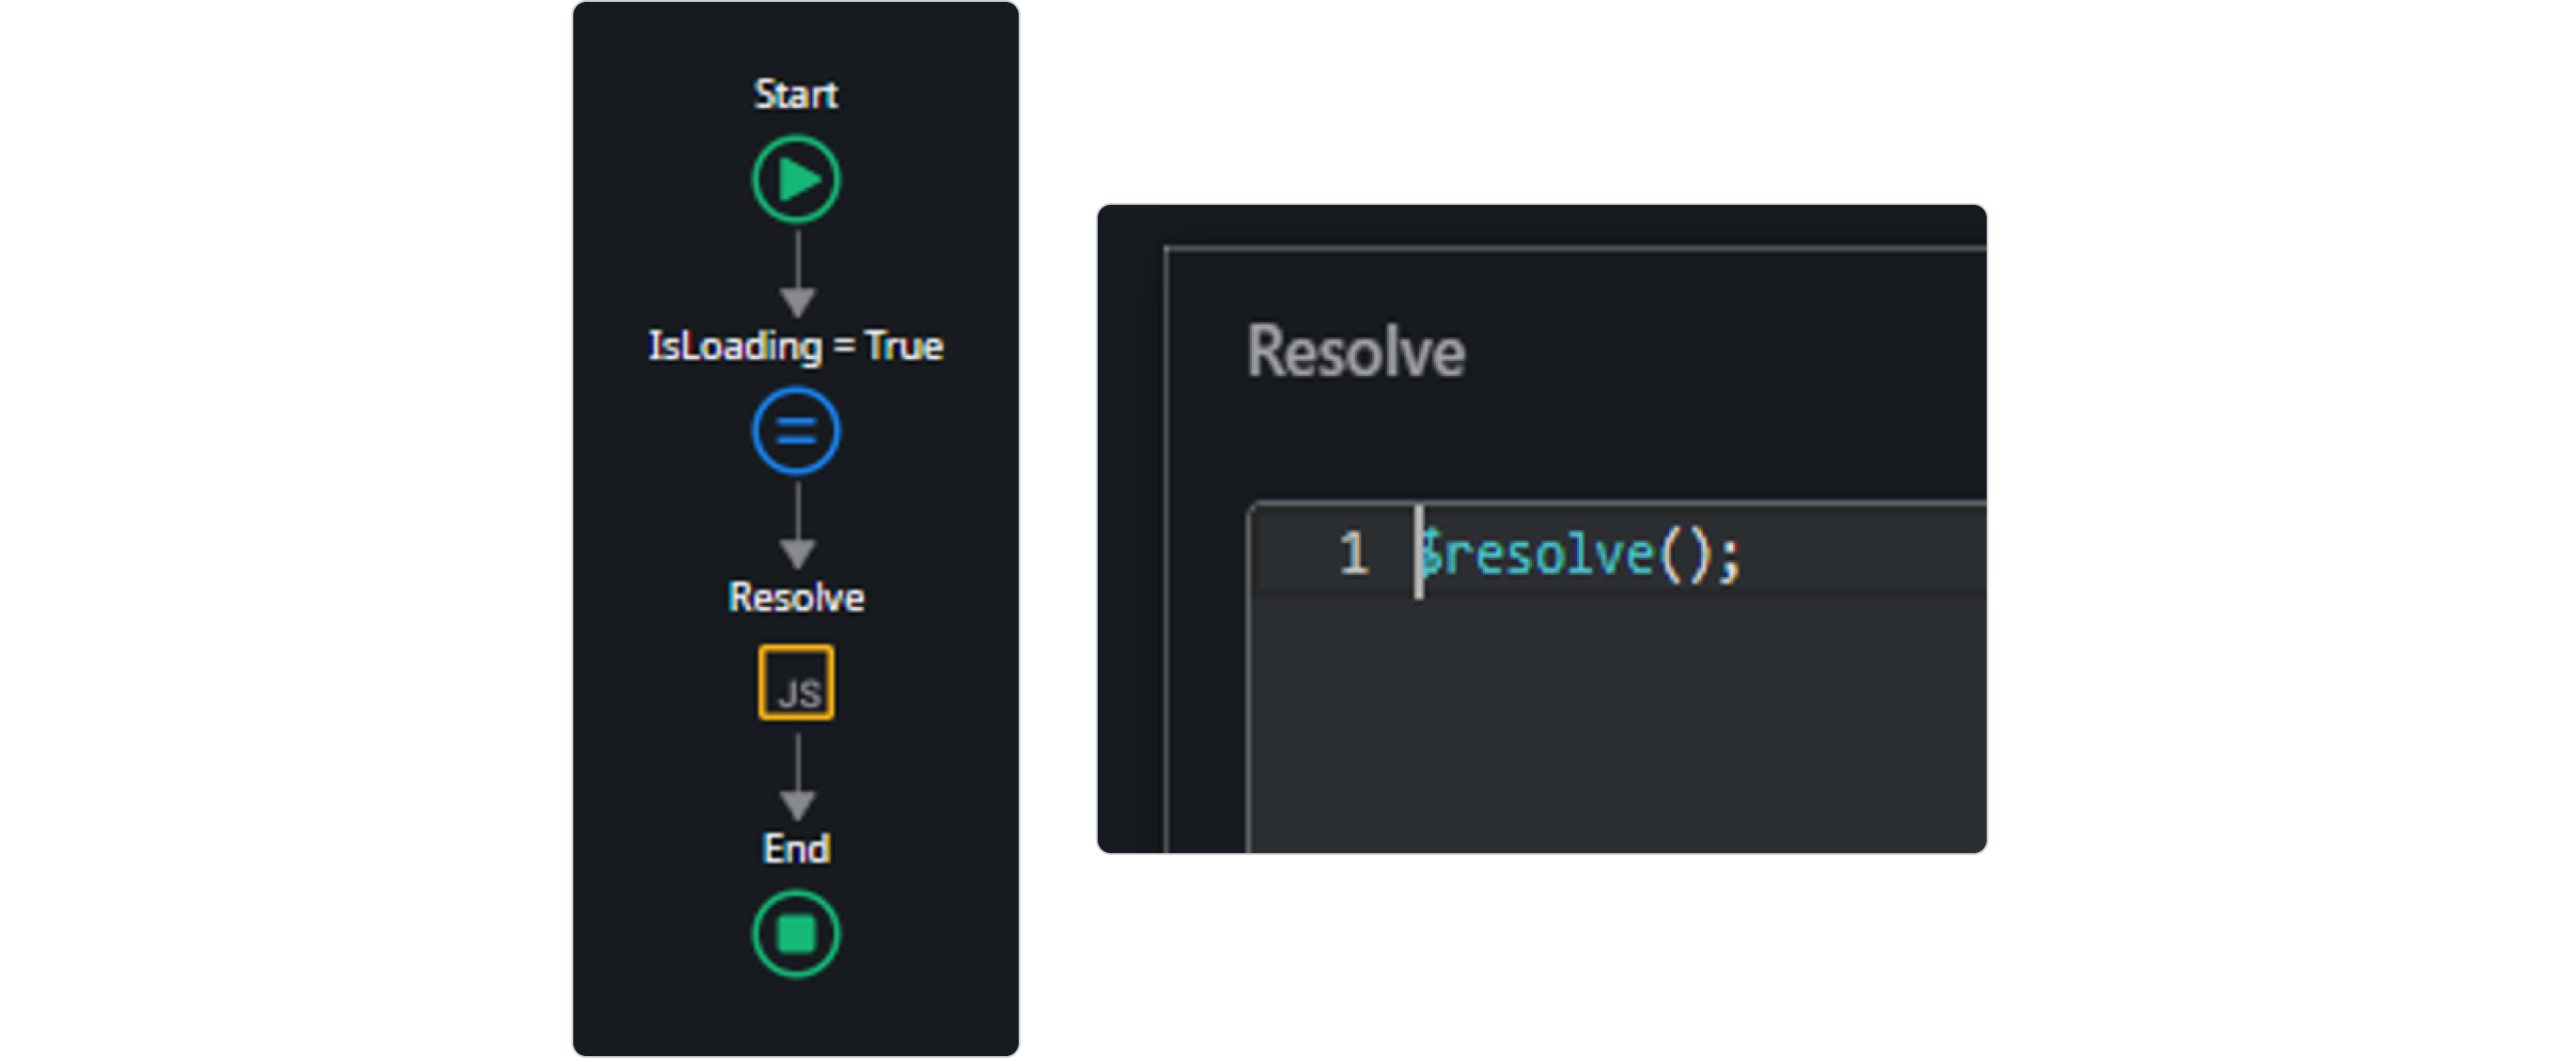
The way to fix this is to set the local IsLoading variable to True asynchronously. The first step is to create the client action that will be called asynchronously; call it SetIsLoadingToTrue. This action will need to contain the original assign to set IsLoading to True and an additional JS node containing the code ‘$resolve’. Here is how the SetIsLoadingToTrue action should look:
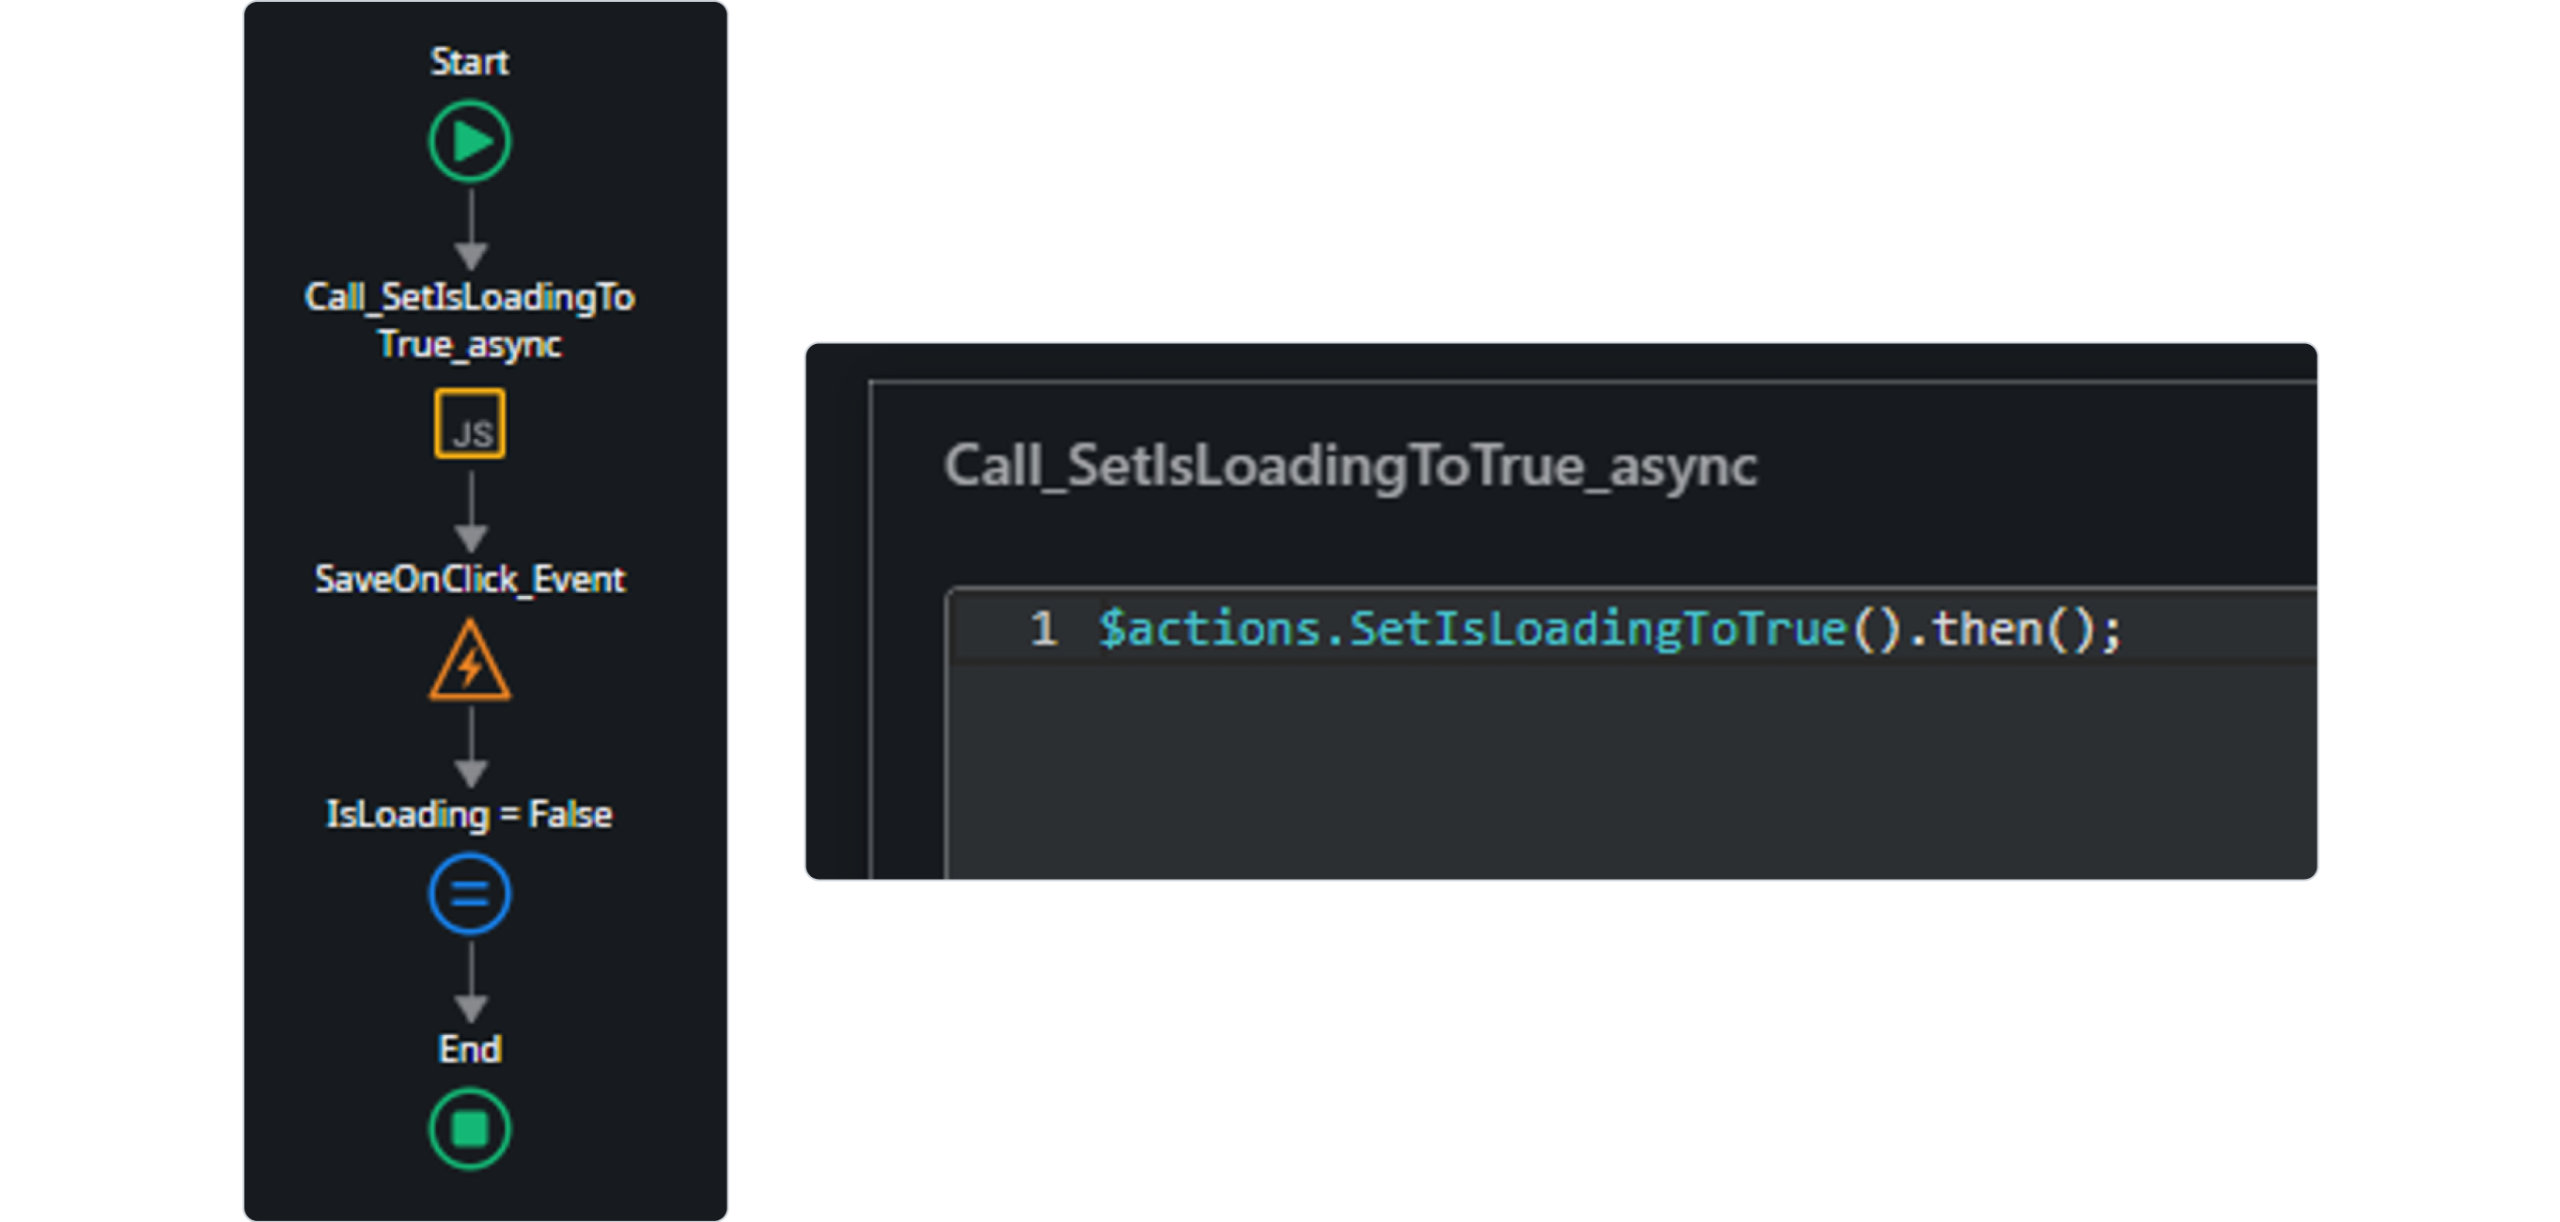
Next, replace the original assign in the ButtonOnClick action with the SetIsLoadingToTrue action but not directly; use a JS node to call it asynchronously by calling the action and adding ‘.then()’ to it. Here is how the ButtonOnClick action should look:
4. Test the asynchronous solution:
Run your app and click the button, you will find that the spinner shows as expected.
For further step by step instructions on integrating JS with OutSystems, here are three courses that cover this topic and more:
While integrating JS into OutSystems offers great potential, developers should be mindful of possible pitfalls:
Platform Updates: Changes to the OutSystems platform may inadvertently impact custom JS code, necessitating careful testing and adaptation.
Security Concerns: Executing custom JS code within OutSystems applications may introduce security vulnerabilities if not properly sanitised and validated
Debugging: The native OutSystems debugging does not offer JS debugging tools so you will have to make use of the browser debugger.
Direct DOM manipulation: Avoid using JS libraries that directly manipulate the DOM, such as jQuery. Such libraries can break Reactive and Mobile apps and make them difficult to maintain.
JS maintenance: Since JS code breaks away from the Low Code nature of OutSystems, the code will largely not be updated and maintained automatically. Hence, you’ll need to remember to update and maintain your JS code as required.
Performance Considerations: Make sure to consider performance by using strategies for optimizing JS code loading and execution. A few recommended strategies include:
Minifying your JS code, especially when using Script files
Ensuring that JS not required during the screen loading process, is loaded last
Putting your JS in Script files rather than writing the code directly into Screen Expressions
Conclusion
Custom JS integration is a potent tool in the arsenal of OutSystems developers, offering the ability to customize and extend applications as and when needed. Not without potential pitfalls and challenges, OutSystems recommends sparing use of JS within the platform. Most features can and should be developed using the built-in drop and drag functionality. But by implementing the JS properly, using appropriate best practices and avoiding the common pitfalls, using custom JS within your applications can elevate them to the next level and push the boundaries of Low Code development.
Build IT Now
Want to learn more about what we can do for your business? And how quickly? Go to the Systems iO services page or